Nextcloude AIO(All In One) 설치

안녕하세요.
업무와 파일서버 그리고 여러가지 기능을 만들고있는 와중에 Nextcloud에 대해서 알게되어 공유드립니다.
nextcloud는 파일서버와 채팅, 일정관리등 여러가지 기능이 제공되는 솔루션입니다.
Docker를 이용하여 Nextcloud를 구축 할 수 있습니다.
주요 특징:
- 간편 설치:
단일 컨테이너에 모든 필수 서비스를 포함하여 복잡한 환경 설정 없이 빠르게 설치할 수 있습니다. - 자동 업데이트 및 유지 관리:
Nextcloud AIO는 시스템 업데이트 및 보안 패치를 자동으로 적용할 수 있어, 관리 부담을 크게 줄여줍니다. - 통합 관리:
Nextcloud와 관련된 모든 구성 요소를 한 곳에서 관리할 수 있어, 개별적으로 여러 컨테이너를 운영할 필요가 없습니다. - 개발 및 테스트에 유용:
소규모 환경이나 테스트, 개인 사용자, 개발자들이 손쉽게 Nextcloud를 구축해 기능을 시험해 볼 수 있습니다.
Nextcloud는 클라우드 스토리지 및 협업 환경을 구축하고자 하는 사용자들에게 매우 유용한 솔루션입니다. 저같은 초보자에도 매우 유용합니다...
Ubuntu Linux 서버에서 기준으로 설명드립니다.
docker를 통하여 nextcloud 설치 및 운영을 하도록 하겠습니다. 그리고 도메인주소는 가지고 계셔야합니다.
1.Docker 설치
apt install docker
apt install docker-compose
위의 명령어를 사용하여 docker를 설치합니다.
2. 컨테이너 생성
data/nextcloud 디렉토리를 생성을 먼저하겠습니다. 그 안에 vi 또는 nano를 통하여 docker-compose.yml 파일을 생성하도록 하겠습니다.
mkdir -p /data/nextcloud- docker-compose.yml 파일
services:
  nextcloud:
    image: nextcloud/all-in-one:latest
    restart: always
    container_name: nextcloud-aio-mastercontainer # This line is not allowed to be changed as otherwise AIO will not work correctly
    volumes:
      - nextcloud_aio_mastercontainer:/mnt/docker-aio-config # This line is not allowed to be changed as otherwise the built-in backup solution will not work
      - /var/run/docker.sock:/var/run/docker.sock:ro # May be changed on macOS, Windows or docker rootless. See the applicable documentation. If adjusting, don't forget to also set 'WATCHTOWER_DOCKER_SOCKET_PATH'!
    ports:
      #- 80:80 # Can be removed when running behind a web server or reverse proxy (like Apache, Nginx, Cloudflare Tunnel and else). See https://github.com/nextcloud/all-in-one/blob/main/reverse-proxy.md
      - 8080:8080
        #- 8443:8443 # Can be removed when running behind a web server or reverse proxy (like Apache, Nginx, Cloudflare Tunnel and else). See https://github.com/nextcloud/all-in-one/blob/main/reverse-proxy.md
    environment: # Is needed when using any of the options below
      - SKIP_DOMAIN_VALIDATION=true
      # - AIO_DISABLE_BACKUP_SECTION=false # Setting this to true allows to hide the backup section in the AIO interface. See https://github.com/nextcloud/all-in-one#how-to-disable-the-backup-section
      - APACHE_PORT=11000 # Is needed when running behind a web server or reverse proxy (like Apache, Nginx, Cloudflare Tunnel and else). See https://github.com/nextcloud/all-in-one/blob/main/reverse-proxy.md
      - APACHE_IP_BINDING=0.0.0.0 # Should be set when running behind a web server or reverse proxy (like Apache, Nginx, Cloudflare Tunnel and else) that is running on the same host. See https://github.com/nextcloud/all-in-one/blob/main/reverse-proxy.md
      # - BORG_RETENTION_POLICY=--keep-within=7d --keep-weekly=4 --keep-monthly=6 # Allows to adjust borgs retention policy. See https://github.com/nextcloud/all-in-one#how-to-adjust-borgs-retention-policy
      # - COLLABORA_SECCOMP_DISABLED=false # Setting this to true allows to disable Collabora's Seccomp feature. See https://github.com/nextcloud/all-in-one#how-to-disable-collaboras-seccomp-feature
      # - NEXTCLOUD_DATADIR=/mnt/ncdata # Allows to set the host directory for Nextcloud's datadir. ⚠️⚠️⚠️ Warning: do not set or adjust this value after the initial Nextcloud installation is done! See https://github.com/nextcloud/all-in-one#how-to-change-the-default-location-of-nextclouds-datadir
      # - NEXTCLOUD_MOUNT=/mnt/ # Allows the Nextcloud container to access the chosen directory on the host. See https://github.com/nextcloud/all-in-one#how-to-allow-the-nextcloud-container-to-access-directories-on-the-host
      # - NEXTCLOUD_UPLOAD_LIMIT=10G # Can be adjusted if you need more. See https://github.com/nextcloud/all-in-one#how-to-adjust-the-upload-limit-for-nextcloud
      # - NEXTCLOUD_MAX_TIME=3600 # Can be adjusted if you need more. See https://github.com/nextcloud/all-in-one#how-to-adjust-the-max-execution-time-for-nextcloud
      # - NEXTCLOUD_MEMORY_LIMIT=512M # Can be adjusted if you need more. See https://github.com/nextcloud/all-in-one#how-to-adjust-the-php-memory-limit-for-nextcloud
      # - NEXTCLOUD_TRUSTED_CACERTS_DIR=/path/to/my/cacerts # CA certificates in this directory will be trusted by the OS of the nexcloud container (Useful e.g. for LDAPS) See See https://github.com/nextcloud/all-in-one#how-to-trust-user-defined-certification-authorities-ca
      # - NEXTCLOUD_STARTUP_APPS=deck twofactor_totp tasks calendar contacts notes # Allows to modify the Nextcloud apps that are installed on starting AIO the first time. See https://github.com/nextcloud/all-in-one#how-to-change-the-nextcloud-apps-that-are-installed-on-the-first-startup
      # - NEXTCLOUD_ADDITIONAL_APKS=imagemagick # This allows to add additional packages to the Nextcloud container permanently. Default is imagemagick but can be overwritten by modifying this value. See https://github.com/nextcloud/all-in-one#how-to-add-os-packages-permanently-to-the-nextcloud-container
      # - NEXTCLOUD_ADDITIONAL_PHP_EXTENSIONS=imagick # This allows to add additional php extensions to the Nextcloud container permanently. Default is imagick but can be overwritten by modifying this value. See https://github.com/nextcloud/all-in-one#how-to-add-php-extensions-permanently-to-the-nextcloud-container
      # - NEXTCLOUD_ENABLE_DRI_DEVICE=true # This allows to enable the /dev/dri device in the Nextcloud container. ⚠️⚠️⚠️ Warning: this only works if the '/dev/dri' device is present on the host! If it should not exist on your host, don't set this to true as otherwise the Nextcloud container will fail to start! See https://github.com/nextcloud/all-in-one#how-to-enable-hardware-transcoding-for-nextcloud
      # - TALK_PORT=3478 # This allows to adjust the port that the talk container is using. See https://github.com/nextcloud/all-in-one#how-to-adjust-the-talk-port
      # - WATCHTOWER_DOCKER_SOCKET_PATH=/var/run/docker.sock # Needs to be specified if the docker socket on the host is not located in the default '/var/run/docker.sock'. Otherwise mastercontainer updates will fail. For macos it needs to be '/var/run/docker.sock'
    # networks: # Is needed when you want to create the nextcloud-aio network with ipv6-support using this file, see the network config at the bottom of the file
      # - nextcloud-aio # Is needed when you want to create the nextcloud-aio network with ipv6-support using this file, see the network config at the bottom of the file

  # # Optional: Caddy reverse proxy. See https://github.com/nextcloud/all-in-one/blob/main/reverse-proxy.md
  # # You can find further examples here: https://github.com/nextcloud/all-in-one/discussions/588
  # caddy:
  #   image: caddy:alpine
  #   restart: always
  #   container_name: caddy
  #   volumes:
  #     - ./Caddyfile:/etc/caddy/Caddyfile
  #     - ./certs:/certs
  #     - ./config:/config
  #     - ./data:/data
  #     - ./sites:/srv
  #   network_mode: "host"

volumes:
  nextcloud_aio_mastercontainer:
    name: nextcloud_aio_mastercontainer # This line is not allowed to be changed as otherwise the built-in backup solution will not work

# # Optional: If you need ipv6, follow step 1 and 2 of https://github.com/nextcloud/all-in-one/blob/main/docker-ipv6-support.md first and then uncomment the below config in order to activate ipv6 for the internal nextcloud-aio network.
# # Please make sure to uncomment also the networking lines of the mastercontainer above in order to actually create the network with docker-compose
# networks:
#   nextcloud-aio:
#     name: nextcloud-aio # This line is not allowed to be changed as otherwise the created network will not be used by the other containers of AIO
#     driver: bridge
#     enable_ipv6: true
#     ipam:
#       driver: default
#       config:
#         - subnet: fd12:3456:789a:2::/64 # IPv6 subnet to use
저희는 8080 포트만 사용계획이기에 8080만 설정하였습니다.
docker-compose up -d명령을 사용하여 이미지를 받고 컨테이너를 실행합니다.
컨테이너가 실행되면 https://localhost:8080으로 접속 해주세요.
3. Config
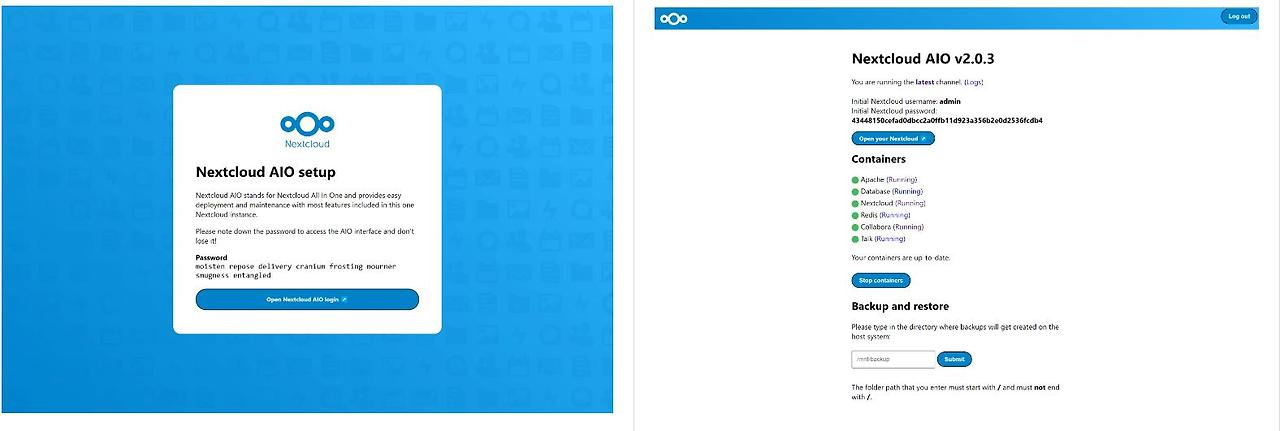
Nextcloude 설정을 시작하겠습니다.
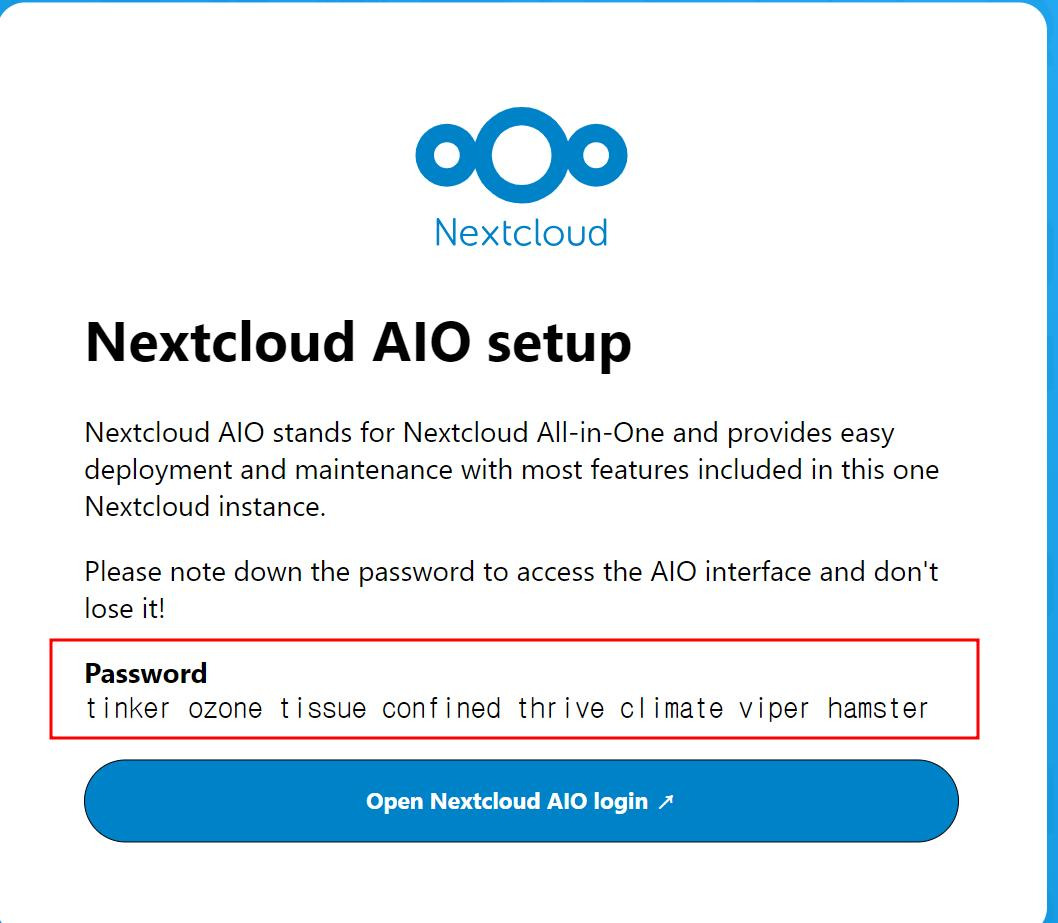
첫화면입니다. password 부분은 메모 해주세요.

다음 페이지에서 해당 password 캡처한 내용을 넣어주시면 됩니다.

다음 페이지에서 가지고 계신 도메인을 연결하셔야합니다. 공유기 또는 네트워크 장비를 통하여 Port 포워딩 및 ip를 도메인에 등록시켜야합니다.

아래에 추가할 애드온을 선택한뒤 컨테이너 다운로드 및 시작을 누르시면 약 5~10분정도 뒤 완료가 됩니다. 그리고 등록하신 도메인으로 접속하게되면 아래와 같이 페이지가 나타납니다 .
최초 비밀번호는 컨테이너 등록 후 안내되니 메모 해주세요.

이상으로 nextcloud 설정을 끝마치겠습니다.
궁금하신 점은 댓글이나 메일로 부탁드립니다. 감사합니다.